
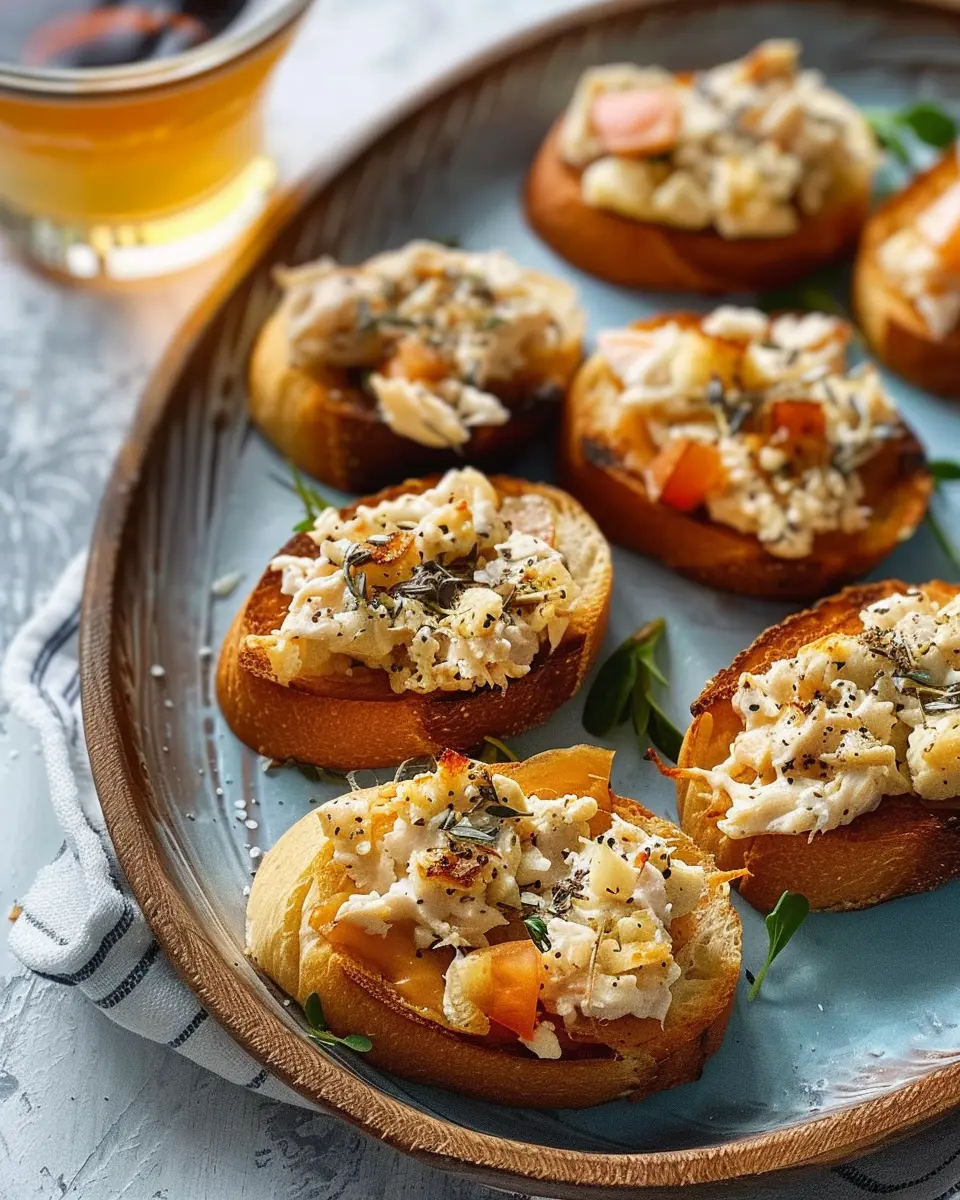
Introduction to Mini Tuna Melts
Are you on the lookout for a deliciously easy meal that fits perfectly into your busy lifestyle as a young professional? Look no further than mini tuna melts! These bite-sized treats combine the classic flavors of a tuna melt with a fun, personal twist, making them ideal for any occasion — whether it’s a quick lunch at home, a gathering with friends, or a late-night snack.
Why Mini Tuna Melts are Perfect for Young Professionals
In today’s fast-paced world, convenience is key. Young professionals often juggle work responsibilities, social lives, and personal wellness. With mini tuna melts, you get a quick, nutritious meal that won’t eat up your precious time. Tuna, rich in omega-3 fatty acids, is linked to numerous health benefits, including improved heart health and brain function. According to the American Heart Association, enjoying fish like tuna at least twice a week can significantly boost your overall wellness.
Preparation is a breeze! All you need is a can of tuna, some cheese, and your favorite toppings. Opt for whole-grain bread for added fiber, or even mini pita pockets for a trendy twist. Personalize your mini tuna melts with ingredients like spicy mustard, chicken ham, or even sautéed veggies for an added crunch. Plus, they’re perfect for meal prepping. Whip up a batch on Sunday, store them in the fridge, and pop them in the oven for a warm, nourishing meal on a weekday evening.
What’s not to love about versatility? Enjoy mini tuna melts as a satisfying snack, a light lunch option, or even as an appetizer for your next get-together. Feeling adventurous? Check out the Tuna Innovation group for creative ideas on incorporating tuna into your meals.
To sum it up, mini tuna melts are not only easy and tasty; they are also a smart choice for those balancing the demands of a busy lifestyle. With minimal hassle, you can enjoy a delightful meal that mirrors your vibrant, on-the-go lifestyle. Get ready to dive into this scrumptious recipe and impress your taste buds while staying effortlessly chic!
Ingredients for Mini Tuna Melts
Essential ingredients you’ll need
Getting started with mini tuna melts is super easy! Here’s your essential list:
- Canned tuna: Opt for high-quality tuna packed in water for the best flavor. It’s the star of the show!
- Mayonnaise: A couple of tablespoons bring moisture and richness to your mixture. You can substitute with Greek yogurt for a healthier twist.
- Shredded cheese: Cheddar is a classic choice, but feel free to get creative with Monterey Jack or pepper jack for a spicy kick.
- Bread: Small slices of your favorite bread (like sourdough or whole grain) will serve as the base for our tasty melts.
Optional add-ins for more flavor
Why not take your mini tuna melts to the next level? Consider adding these flavorful extras:
- Turkey bacon: A few crispy bits can add a smoky touch that pairs wonderfully with tuna.
- Capers or pickles: For a zesty crunch, these ingredients elevate the flavor profile significantly.
- Spices: A sprinkle of paprika or a dash of hot sauce can provide that little extra oomph!
Feel free to mix and match based on your preferences! And if you’re curious about some culinary tips and tricks, check out this great resource on tuna recipes. Happy cooking!
Step-by-step Preparation of Mini Tuna Melts
Mini tuna melts are a fantastic way to enjoy a quick and fulfilling meal. They’re easy to prepare, making them perfect for busy weekdays or even casual gatherings with friends. Here’s a step-by-step guide to crafting these delightful bites at home.
Gather Your Ingredients
Before you start cooking, make sure you have everything you need. The good news is, the ingredients for mini tuna melts are simple and generally easy to find.
- Canned Tuna: Opt for chunk light or solid white tuna, whatever your preference is.
- Mayonnaise: A classic ingredient that keeps the tuna moist.
- Mustard: Adds a zesty kick—Dijon works well here.
- Celery: Finely chopped for crunch and freshness.
- Onion: You can choose between red or green onions, depending on your taste.
- Cheese: Choose your favorite meltable cheese, such as Cheddar, Swiss, or Monterey Jack.
- English Muffins: The perfect base for your melts.
- Turkey Bacon or any of your favorite toppings: For added texture and flavor.
Gather all your ingredients and set aside an area to work in. This not only speeds up the cooking process but keeps your workspace organized and mess-free.
Mix the Tuna Filling
Now that you have everything prepped, it’s time to whip up your tuna filling. In a mixing bowl, combine:
- One can of drained tuna
- Two tablespoons of mayonnaise
- One teaspoon of mustard
- One stalk of finely chopped celery
- A small amount of diced onion (to your liking)
Mix these ingredients until they are well combined. The mixture should be creamy yet chunky, reflecting that delightful homemade touch. As you mix, consider adding other ingredients like chopped pickles or even a sprinkle of paprika for a unique twist. For a great reference on tuna nutrition and recipes, check out the Seafood Nutrition Partnership.
Toast the English Muffins
Your filling is ready, and now it’s time to prepare the base for your mini tuna melts. Cut your English muffins in half and lay them on a baking sheet.
- Toast them in a preheated oven at 400°F (200°C) for about 5 to 6 minutes or until they start to turn golden brown.
- Keep an eye on them to avoid over-browning.
This stage is essential as it gives a crispy texture that complements the creamy tuna filling beautifully.
Assemble the Mini Tuna Melts
Here comes the fun part—assembly! Start by spreading a generous scoop of your tuna mixture onto each toasted muffin half.
- Top with cheese: You can be generous with how much cheese you add; it’s all about personal preference. If you’re feeling adventurous, throw on some crispy turkey bacon on top of your fills.
As you assemble, think about different toppings you might enjoy, like sliced tomatoes or jalapeños for an extra kick.
Broil and Achieve That Golden Perfection
Finally, it’s time for the magic to happen! Place your assembled mini tuna melts under the broiler.
- Broil on high for about 2-4 minutes: Keep a close watch as they can burn quickly. You’re aiming for bubbly, melted cheese and a slight toast on the edges.
Let them cool for a minute before serving. These mini tuna melts are best enjoyed warm, offering a satisfying crunch and a burst of flavor with each bite. Enjoy as an appetizer or pair them with a side salad for a quick meal.
Now that you have your mini tuna melts ready, think about the compliments you’ll receive! Happy cooking!
Variations on Mini Tuna Melts
When it comes to mini tuna melts, the possibilities are endless! Why stick with a basic recipe when you can take it up a notch? Here are some delicious variations to tantalize your taste buds.
Spicy Mini Tuna Melts with Jalapeños
Looking to add a kick to your mini tuna melts? Why not toss in some finely chopped jalapeños? The heat from the peppers adds a delightful contrast to the creamy tuna mixture. To make them:
-
Ingredients:
-
1 can of tuna, drained
-
2 tablespoons mayonnaise
-
2 tablespoons chopped jalapeños
-
1 tablespoon lime juice
-
Salt and pepper to taste
-
Slices of your favorite bread or bread alternatives
-
Instructions:
- Mix the tuna, mayonnaise, jalapeños, lime juice, salt, and pepper in a bowl.
- Spread the mixture on bread slices.
- Top with cheese if desired and broil until bubbly.
These fiery bites will surely impress at your next gathering. Pair them with a refreshing mocktail for balance!
Mediterranean Mini Tuna Melts with Olives and Feta
For a taste of the Mediterranean, consider mini tuna melts enriched with olives and feta. The briny olives and tangy feta introduce a whole new flavor dimension:
-
Ingredients:
-
1 can of tuna, drained
-
2 tablespoons mayonnaise
-
¼ cup chopped kalamata olives
-
¼ cup crumbled feta cheese
-
Fresh oregano or basil, chopped
-
Whole grain or pita bread
-
Instructions:
- Combine the tuna, mayonnaise, olives, feta, and herbs in a bowl.
- Spread the mixture on preferred bread.
- Broil until the cheese is melted and edges are golden.
These Mediterranean delights are not just flavorful but also pack a punch of nutrients, making them a great option for a quick lunch or snack. For more delectable ideas, check out EatingWell for healthy recipes and tips that fit your lifestyle.
With these variations on your mini tuna melts, you can let your creativity shine in the kitchen. Enjoy experimenting with different ingredients and flavors!
Cooking Tips and Notes for Mini Tuna Melts
Choosing the Right Tuna
When it comes to mini tuna melts, the type of tuna you select can significantly affect the final dish. Opt for chunk light tuna in water for a lighter flavor and firmer texture. This option tends to hold up better during cooking. If you prefer a richer taste, albacore tuna is a great choice and can elevate your melts. Just be sure to drain the tuna well to avoid sogginess.
Best Cheese Options for Melting
Cheese can make or break your mini tuna melts. For an ooey-gooey experience, try sharp cheddar or Havarti; both melt beautifully and add dynamic flavors. If you’re feeling adventurous, consider adding a hint of pepper jack for a spicy twist. Whatever cheese you choose, ensure it’s grated or sliced thinly for an even melt.
For more cheese ideas, check out Serious Eats for expert recommendations! Happy cooking!
Serving Suggestions for Mini Tuna Melts
Perfect Pairings with Sides and Dips
When you whip up delicious mini tuna melts, finding the right sides and dips can elevate the experience. Consider serving them with:
- Crispy Veggie Sticks: Carrot, cucumber, and bell pepper sticks offer a refreshing crunch.
- Creamy Avocado Dip: This pairs beautifully, adding a rich, buttery flavor that complements the tuna.
- Simple Green Salad: A light salad with a citrus vinaigrette can balance the richness of the melts.
For a delightful twist, try adding some homemade tartar sauce or even a zesty salsa for dipping!
Creative Serving Ideas for Gatherings
Throwing a casual gathering? Your mini tuna melts can be a hit! Serve them on a large platter for guests to grab and enjoy. You can also:
- Build-your-own mini melt station: Provide various toppings like olives, pickles, and cheeses, letting guests personalize their melts.
- Skewers for Appetizers: Assemble mini melts on skewers for a fun, grab-and-go option.
- Tasting Flights: Offer variations like classic, spicy, or even Mediterranean-inspired.
These bites not only taste great but also spark conversation and bring a fun element to your event.
Time Breakdown for Mini Tuna Melts
When you’re craving a quick and delicious meal, knowing the time commitment can be a game-changer. Let’s break down the time you’ll need to whip up these delightful mini tuna melts.
Preparation time
Getting everything ready shouldn’t take long. Set aside about 10 minutes to gather your ingredients. This includes draining your tuna, chopping up any veggies, and mixing everything in a bowl. Keeping things organized makes cooking smoother—trust me!
Cooking time
Once you’ve prepped, it’s time to heat up the oven. You’ll need about 15 minutes for these little bites to toast to perfection. That golden melty cheese is totally worth the wait, so sip on something refreshing while you wait.
Total time
In total, you’re looking at approximately 25 minutes from start to finish. Perfect for a satisfying dish that doesn’t consume your whole evening. This meal is ideal for busy young professionals looking to enjoy a quick yet fulfilling dinner or snack.
For more tips on meal prep, check out Food Network’s quick meals guide. Happy cooking!
Nutritional Facts for Mini Tuna Melts
Calories per serving
These delightful mini tuna melts typically clock in at about 150 calories per serving. This makes them a smart choice for a quick snack or a light meal without feeling guilty.
Protein content
Packed with protein, each serving contains roughly 15 grams. This helps keep you full longer, making it easier to power through your busy day. According to nutrition experts, protein is essential for muscle repair and growth, especially for those with active lifestyles.
Key nutrients
Not only do these mini tuna melts deliver protein, but they also offer important vitamins and minerals. Tuna is rich in Omega-3 fatty acids, promoting heart health, while the addition of cheese brings calcium and vitamin D into the mix. If you want to learn more about nutritional needs, sites like the USDA can offer valuable insights.
By enjoying these flavorful treats, you’re nourishing your body without compromising on taste!
FAQs about Mini Tuna Melts
Can I use canned chicken instead of tuna?
Absolutely! If you’re not a fan of tuna or just want to switch things up, using canned chicken is a fantastic alternative for your mini tuna melts. Both options provide a similar texture and protein kick, making them great substitutes. Just be sure to season your chicken accordingly, as canned chicken can be milder in flavor. You can add some lemon juice or your favorite spices to give it that extra zing!
How can I make mini tuna melts healthier?
There are plenty of ways to lighten up your mini tuna melts without sacrificing flavor. Here are a few tips to consider:
- Whole Grain Bread: Opt for whole grain or sprouted bread instead of white bread. It’s more nutritious and filling.
- Greek Yogurt: Replace mayonnaise with Greek yogurt for a protein boost and fewer calories.
- Load on Veggies: Add diced peppers, spinach, or shredded carrots to your tuna mixture for added nutrients and flavor.
- Lower Fat Cheese: Choose reduced-fat cheese varieties or use less cheese overall; your melts will still be delicious!
For more tips, you might find resources from the American Heart Association helpful!
What are the best ways to customize my mini tuna melts?
Customization is the name of the game when it comes to mini tuna melts. Here are some fun ideas:
- Herbs and Spices: Experiment with fresh herbs like dill or cilantro to elevate the flavors.
- Cheese Choices: Swiss, cheddar, or even pepper jack can add various taste profiles to your melts.
- Add-ins: Consider incorporating olives, capers, or even a dash of hot sauce for an extra kick.
- Toppings: Try finishing them off with sliced avocado, fresh tomatoes, or even a drizzle of balsamic glaze.
Feel free to mix and match these options to find the combination that delights your palate!
Conclusion on Mini Tuna Melts
Recap on the benefits and simplicity of making mini tuna melts
In summary, mini tuna melts are not only a quick and easy solution for busy weeknights, but they also pack a flavorful punch that keeps everyone coming back for more. With just a handful of ingredients, you can whip up this satisfying dish that’s both nutritious and indulgent. Whether you’re enjoying them as a light dinner or a snack, the combination of tender tuna, melty cheese, and your favorite toppings never disappoints.
Plus, they’re versatile! You can easily customize them with ingredients like chicken ham or turkey bacon to suit your taste. For a side of freshness, pair them with a crisp salad or some roasted veggies—it’s a perfect match. So, why not give these delightful bites a try? Check out sources like Healthline for more inspiration on healthy additions to your meals!
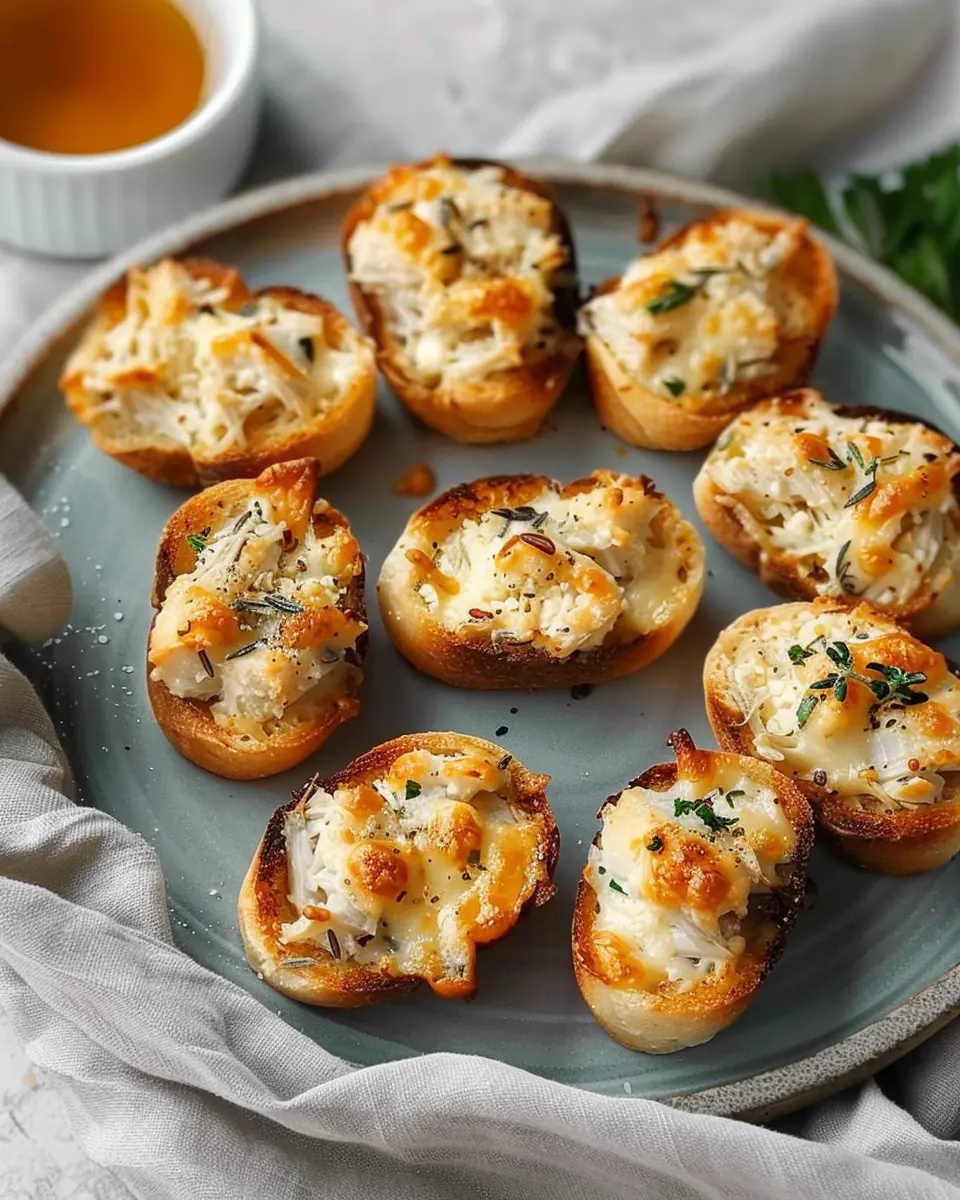
PrintMini Tuna Melts: Easy, Flavorful Bites for Every Home Cook

These Mini Tuna Melts are perfect appetizers or snacks, combining the classic flavors of tuna salad with gooey cheese on crispy bread.
- Prep Time: 10 minutes
- Cook Time: 12 minutes
- Total Time: 22 minutes
- Yield: 4 servings
- Category: Appetizer
- Method: Baking
- Cuisine: American
- Diet: Gluten-Free
Ingredients
- 2 cans tuna, drained
- 1/4 cup mayonnaise
- 1 tablespoon Dijon mustard
- 1/4 cup diced celery
- 1/4 cup diced onion
- 1 teaspoon lemon juice
- 1 cup shredded cheddar cheese
- 8 slices bread
- 2 tablespoons butter, softened
Instructions
- Preheat the oven to 350°F (175°C).
- In a bowl, mix the drained tuna, mayonnaise, mustard, celery, onion, lemon juice, and half of the cheddar cheese.
- Spread butter on one side of each bread slice.
- Place bread slices butter-side down on a baking sheet.
- Spoon the tuna mixture onto each piece of bread and top with the remaining cheese.
- Bake in the preheated oven for about 10-12 minutes, until the cheese is melted and bubbly.
- Remove from the oven, let cool slightly, and serve warm.
Notes
- For extra flavor, add capers or chopped pickles to the tuna mixture.
- Try using different types of cheese or bread for variety.
Nutrition
- Serving Size: 2 melts
- Calories: 220
- Sugar: 1g
- Sodium: 500mg
- Fat: 12g
- Saturated Fat: 5g
- Unsaturated Fat: 6g
- Trans Fat: 0g
- Carbohydrates: 20g
- Fiber: 1g
- Protein: 14g
- Cholesterol: 30mg


")