
Introduction to Garlic Herb Braided Bread
Baking your own bread is one of life’s simplest pleasures, especially when it comes to creating something as delightful as garlic herb braided bread. The aroma fills your kitchen with warmth and joy, transforming the space into a comforting haven. Imagine pulling a fresh loaf out of the oven, the golden crust crackling under your fingertips, and the lush herbs mingling with rich garlic scents — pure bliss!
Savoring the homemade touch: Why bake your own bread?
You might wonder, “Why should I spend time making bread when I can just buy a loaf from the store?” That’s a fair question, and the answer is layered (similar to our bread!). Here are a few reasons to consider:
-
Quality Ingredients: When you bake at home, you have complete control over the ingredients. You can choose organic flour, fresh herbs, and even the type of olive oil you use. This can elevate your garlic herb braided bread from ordinary to extraordinary.
-
Health Benefits: Store-bought bread often contains preservatives and additives. According to the Food and Drug Administration (FDA), many commercial bread loaves have unpronounceable ingredients that might not be the best choice for your health. Making your own bread allows you to avoid these extras, leading to a healthier option.
-
Skill Development: Baking is a wonderful skill to cultivate. It’s like a meditative practice; focusing on kneading dough can be a stress reliever after a long workday. Plus, you’ll impress your friends and family with your culinary prowess!
-
Creative Freedom: When you bake, the possibilities are endless. Want to swap out garlic for a different flavor? Go for it! Add some cheese, or perhaps a sprinkle of chili flakes for a spicy twist.
If you’re feeling inspired, you might want to dive deeper into the world of homemade bread. The Bread Baking Society offers an array of resources for all levels of baking enthusiasts.
So, roll up those sleeves and get ready to create something special. Your kitchen is about to become a mini bakery, and your garlic herb braided bread will soon be the star of the show!
Ingredients for Garlic Herb Braided Bread
Creating the perfect garlic herb braided bread is a delightful experience, embracing both the aromas and tastes that come from simple yet flavorful ingredients. Here’s what you’ll need to whip up this wonderful loaf:
Essential Ingredients
- All-Purpose Flour: 4 cups for that fluffy texture.
- Warm Water: About 1 ½ cups helps activate the yeast.
- Active Dry Yeast: 2 ¼ teaspoons, the magic behind the rise.
- Sugar: 2 tablespoons, to balance the flavors and feed the yeast.
- Salt: 2 teaspoons brings out every ingredient’s flavor.
- Olive Oil: 3 tablespoons, adding richness and moisture.
- Garlic: 4-6 cloves, minced for that strong garlicky punch.
- Fresh Herbs: A mix of parsley, thyme, and rosemary, finely chopped for aromatic goodness.
- Grated Parmesan Cheese: Optional, but don’t skip it if you like depth of flavor!
Each of these ingredients plays a unique role in creating a perfectly braided bread that you can enjoy on its own or as a perfect side dish! You can find tips on using fresh vs. dried herbs here: Herb Uses.
If you’re excited to dive into this delicious baking project, remember that you can always personalize the bread with your favorite herbs or cheeses! What’s your twist on the garlic herb braided bread?
Preparing Garlic Herb Braided Bread
Making garlic herb braided bread is not just about the final product; the entire process is a delightful experience that enhances your kitchen and home with mouthwatering aromas. Here’s how to create this masterpiece from scratch, step-by-step.
Activate the yeast
The first critical step in bringing your garlic herb braided bread to life is activating the yeast. This simple but crucial action sets the foundation for your dough. Here’s how to do it:
- Measure one packet (about 2¼ teaspoons) of active dry yeast.
- Stir the yeast into a warm mixture of ½ cup of water (around 110°F) and a teaspoon of sugar. The sugar helps to feed the yeast, encouraging it to wake up and start bubbling.
- Wait for about 5-10 minutes. If you’ve done this correctly, the mixture should froth up like a miniature volcano! This means the yeast is ready to go.
Create the dough
With your yeast bubbling away, it’s time to create a delicious dough. In a large bowl, combine the activated yeast mixture with:
- 3 cups of all-purpose flour
- 1 teaspoon of salt
- 1 tablespoon of finely chopped garlic (fresh or roasted, your choice)
- 1 tablespoon of your preferred herbs (think basil, rosemary, or thyme)
Mix it all together until it starts to form a shaggy mass. If you need some extra moisture, you can add a bit more water or olive oil.
Knead to perfection
Kneading is where the magic happens, transforming your dough from sticky to silky. On a lightly floured surface:
- Dump out your dough and begin kneading.
- Knead for about 8-10 minutes. This technique helps develop gluten, giving your bread structure and chewiness.
- Tip: If the dough is too tacky, sprinkle with flour little by little until you achieve a smooth, elastic dough that springs back when poked.
The first rise
Now that your garlic herb braided bread dough is kneaded, it’s time to let it rise.
- Transfer your dough into a lightly oiled bowl (this prevents sticking).
- Cover it with a damp cloth and place it in a warm, draft-free area for about an hour or until it doubles in size.
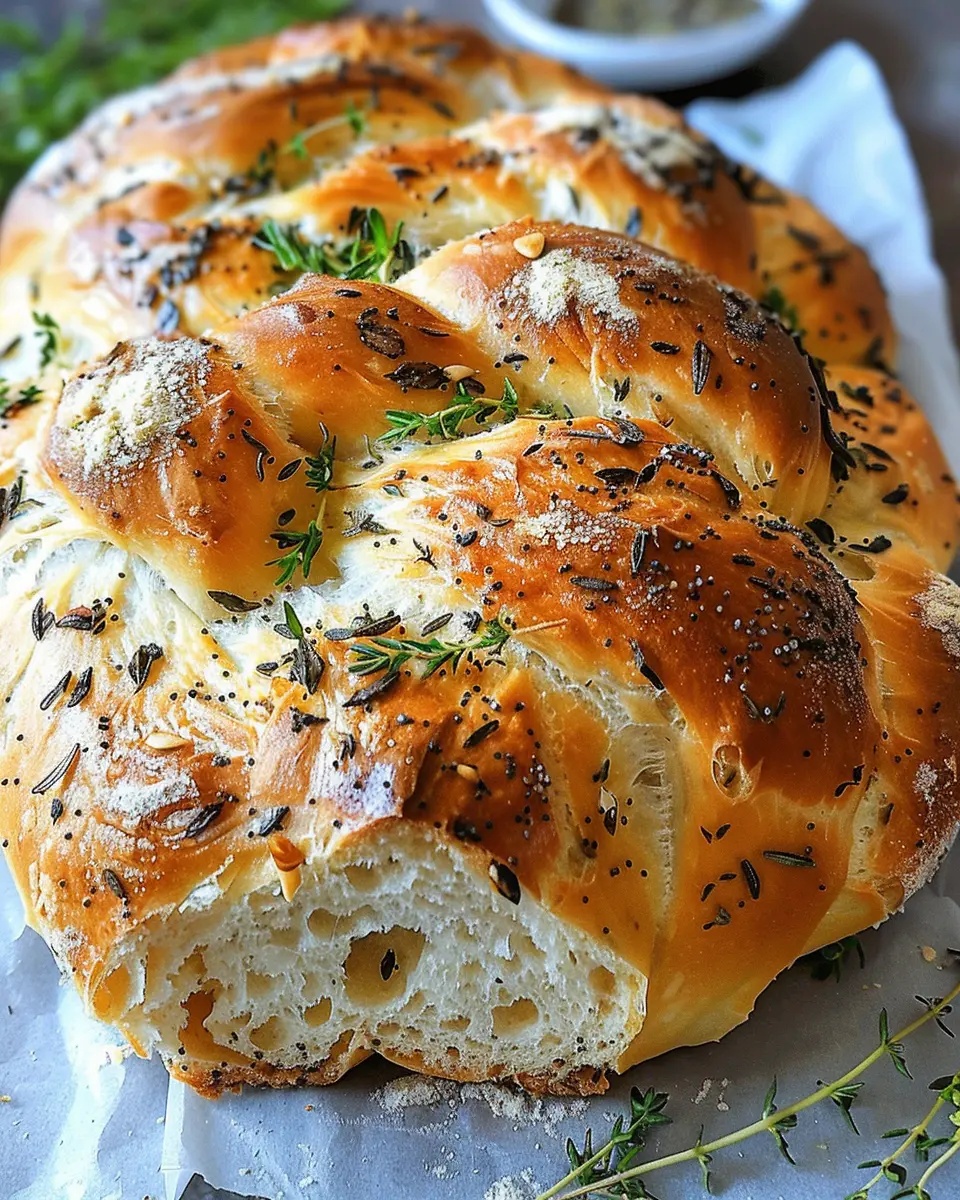
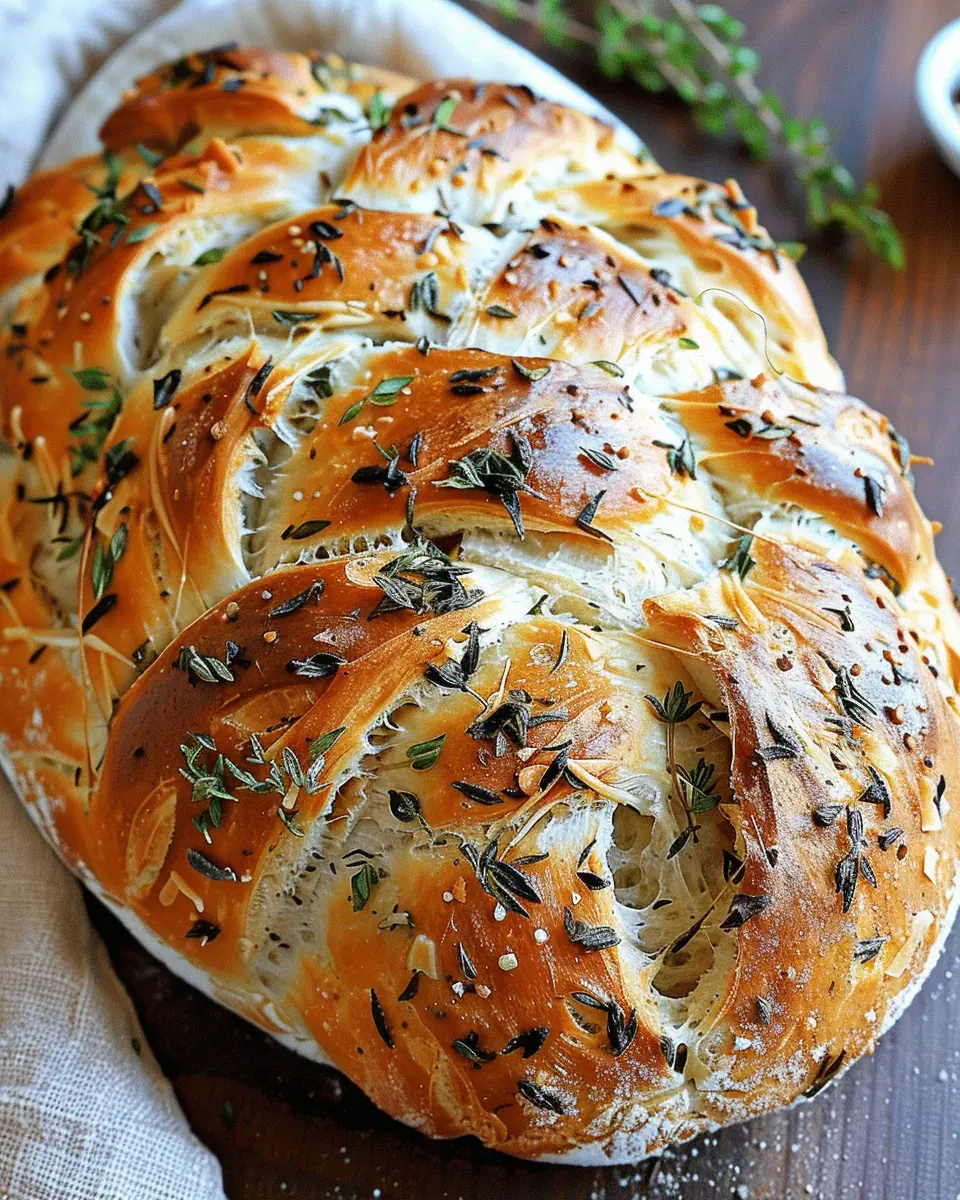
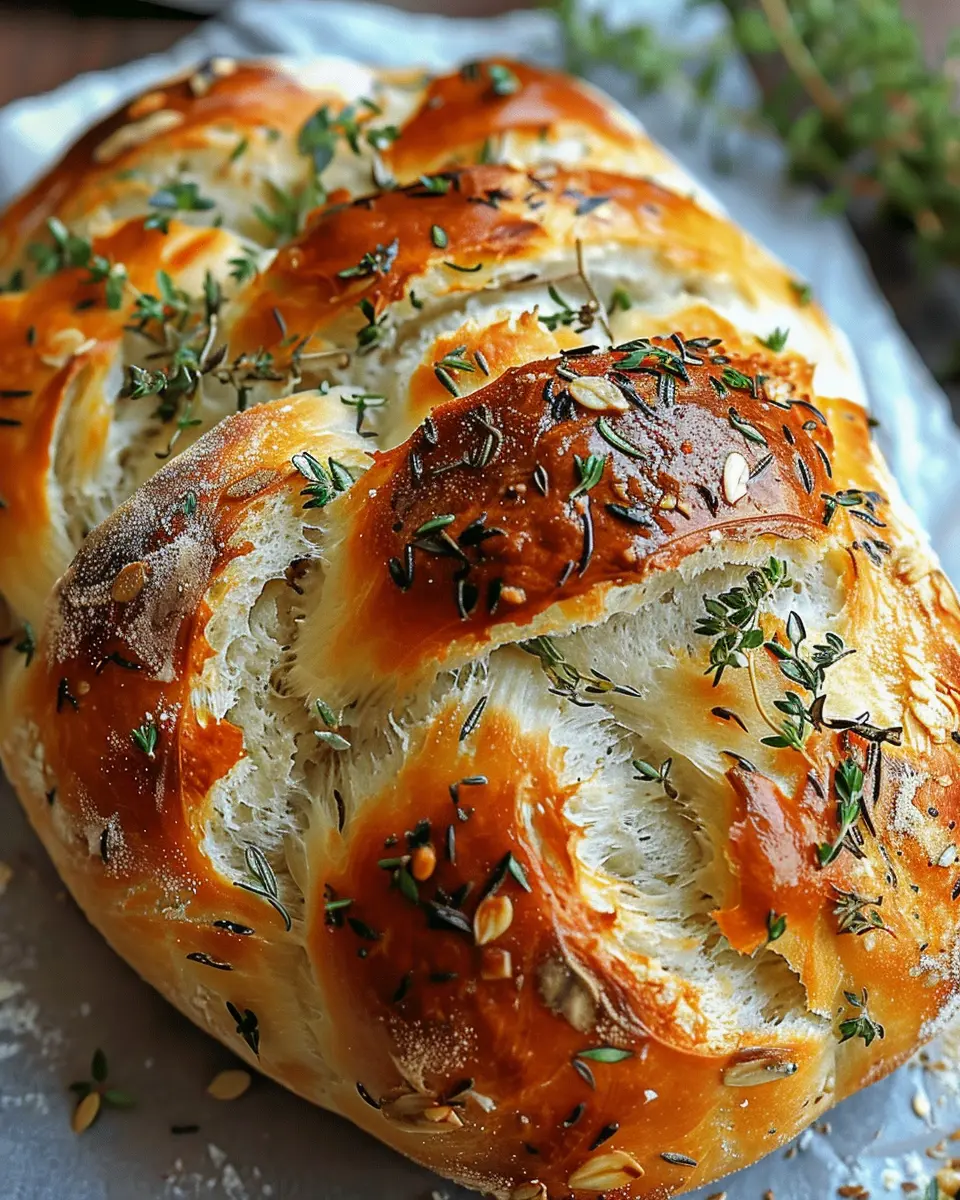
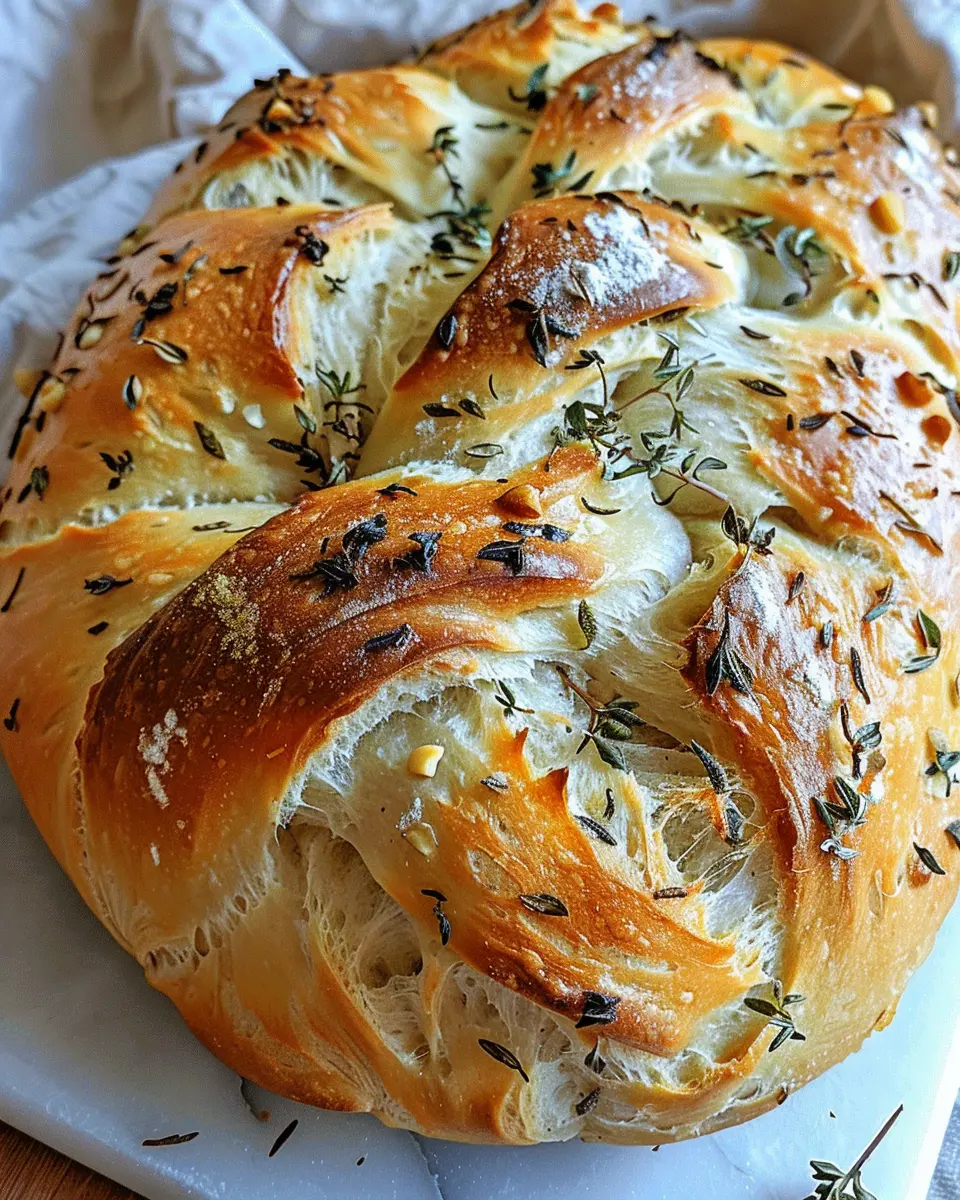
Shaping the braid
Once you’ve completed the first rise, the fun part begins—shaping your bread.
- Punch down the dough gently to release air bubbles, then divide it into three equal pieces.
- Roll each piece into a rope about 12-14 inches long.
- Braid the ropes together as you would with hair, pinching the ends to seal them. This step not only looks stunning but helps the bread bake evenly.
The second rise
Your braided masterpiece needs one more rise before baking.
- Place the braided dough on a baking sheet lined with parchment paper.
- Cover it again with a cloth and let it rise for about 30 minutes. This allows the dough to fluff up and creates an airy texture.
Baking the bread
It’s nearly time to enjoy your beautiful garlic herb braided bread!
- Preheat your oven to 375°F.
- When the bread finishes its second rise, brush the top with an egg wash (1 beaten egg mixed with a tablespoon of water) for that golden sheen.
- Bake for 25-30 minutes or until the crust is golden brown and sounds hollow when tapped on the bottom.
Once baked, let it cool on a wire rack. Your garlic herb braided bread is not just visually pleasing; it has an irresistible aroma and taste that will elevate any meal. Serve it warm with butter, as an appetizer or as a delightful side dish. Happy baking!
For more delicious bread recipes, check out King Arthur Baking or Food Network for great tips and ideas.
Variations on Garlic Herb Braided Bread
When it comes to creating variations of garlic herb braided bread, the possibilities are almost endless! Let’s explore a couple of delicious twists that will delight your taste buds and elevate your baking game.
Spicy Garlic Herb Bread
If you’re a fan of heat, why not crank up the spice in your garlic herb braided bread? Adding crushed red pepper flakes or diced jalapeños to your garlic herb mixture can create an exciting flavor profile. Here’s how to spice things up:
- Enhancement: Mix in 1-2 teaspoons of crushed red pepper flakes directly into the herb-infused butter.
- Infusion: For a more intense flavor, consider adding finely chopped pickled jalapeños into the dough before braiding.
This fiery version pairs perfectly with a creamy dip for a fun appetizer or snack—just think about how amazing it could be alongside a chilled lemony yogurt sauce!
Cheesy Garlic Herb Twist
Who doesn’t love the combination of cheese and garlic? This variation takes the classic garlic herb braided bread to a whole new level of indulgence. Here’s how:
- Cheese Layering: Sprinkle shredded mozzarella or cheddar between the layers of dough during your braiding process.
- Finishing Touch: For an extra cheesy crust, brush the top of the loaf with butter and sprinkle with grated Parmesan just before baking.
Imagine tearing off a piece of this cheesy, garlicky delight and savoring the gooey goodness inside. It’s a guaranteed crowd-pleaser for gatherings or cozy nights in!
For more ideas and inspirations, check out The Kitchn or Serious Eats to take your baking creativity even further!
Cooking Tips and Notes for Garlic Herb Braided Bread
When it comes to making garlic herb braided bread, a few tips can make your baking experience foolproof. First and foremost, always use fresh herbs for a vibrant flavor. Whether you prefer parsley, rosemary, or even basil, they each bring something unique to the table. If you’re short on fresh herbs, consider using high-quality dried versions—you’ll still enjoy a delightful taste!
For the best texture, knead the dough well for about 8-10 minutes until it’s smooth and elastic. This process develops the gluten, giving your bread that perfect chew. Don’t forget to let the dough rise in a warm place; it loves a nice cozy environment.
If you’re feeling adventurous, try adding some Turkey Bacon or Chicken Ham into the braid for a savory twist. Just be sure to chop them finely so they integrate evenly. Lastly, brush the tops with olive oil right before baking for a golden crust. Need more inspiration? Check out this baking guide for ambitious bakers. Happy baking!
Serving suggestions for Garlic Herb Braided Bread
When it comes to serving garlic herb braided bread, the options are nearly endless. This delicious creation not only stands out on its own but also pairs beautifully with various dishes. Here are some delightful serving suggestions to elevate your dining experience:
Perfect Pairings
-
Soups and Stews: Serve warm slices with hearty soups like minestrone or vegetable stew. The buttery flavor complements the richness and adds a delightful twist.
-
Salads: A fresh garden salad dressed with a light vinaigrette can balance the robust flavors of the garlic herb braided bread. Try adding roasted vegetables for extra texture.
-
Cheese Board: Include slices of your garlic herb braided bread on a cheese platter. Consider pairing it with soft cheeses like goat cheese or creamy brie for a mouthwatering combination.
Additional Ideas
-
Breakfast Delight: Top a slice with avocado and Turkey Bacon for a satisfying breakfast. The creamy avocado and savory bacon contrast wonderfully with the herbal notes of the bread.
-
Elegant Appetizers: Cut the bread into smaller pieces and serve with hummus or olive oil for dipping. It’s a fantastic way to impress guests at any gathering.
By considering these suggestions, you’ll discover just how versatile garlic herb braided bread can be in complementing various meals and occasions. Who doesn’t love a warm, homemade loaf that’s perfect for sharing? Happy baking!
Time breakdown for Garlic Herb Braided Bread
When you’re about to whip up a batch of garlic herb braided bread, it’s good to have a clear idea of the time you’ll need. This will help you plan your kitchen activities and ensure everything runs smoothly. Here’s how it breaks down:
Preparation time
Gathering your ingredients and getting everything mixed and kneaded will take about 20 minutes. It’s a great time to sip your favorite tea or catch up on a podcast while you work!
Rising time
Next, let the dough rise. You’ll want to give it approximately 1 hour to double in size. This is the perfect opportunity to tidy up your kitchen or maybe even prep a simple side salad to enjoy with the bread once it’s baked.
Baking time
After braiding the dough, pop it in the oven. Baking should take around 25-30 minutes. Just imagine the heavenly aroma filling your home!
Total time
All in all, expect to spend about 1 hour and 50 minutes from start to finish. Just think about the deliciousness that awaits, and it will be worth every minute! If you want more tips on timing and preparation, check out these bread-making techniques. Happy baking!
Nutritional facts for Garlic Herb Braided Bread
When considering the delicious Garlic Herb Braided Bread, understanding its nutritional profile can enhance your enjoyment. Let’s dive into some key nutritional facts.
Calories
A single serving of this garlic herb braided bread contains approximately 150 calories. This makes it a delightful choice for a side or a snack without overwhelming your daily caloric intake.
Protein
In terms of protein, each serving provides about 4 grams. While not a complete protein source, it contributes to your daily intake and pairs well with protein-rich toppings like turkey bacon or chicken ham.
Carbohydrates
With around 30 grams of carbohydrates per serving, this bread is a great source of energy. The combination of these carbs with herbs not only offers flavor but also essential nutrients.
If you’re curious to learn more about the nutritional benefits of bread, check out resources from the Whole Grains Council or Healthline. These sites offer valuable insights into how to make the most of your favorite baked goods!
FAQs about Garlic Herb Braided Bread
Can I use whole wheat flour?
Absolutely! If you want to give your garlic herb braided bread a nutritious twist, whole wheat flour is a great option. It adds a slightly nutty flavor and provides more fiber, making your bread a healthier choice. However, you might want to mix it with all-purpose flour for the best texture. A 50/50 blend often works wonders, giving you the health benefits without sacrificing that delightful fluffiness.
How do I store leftover braided bread?
Storing your delicious garlic herb braided bread properly is key to keeping it fresh. If you have leftovers, simply wrap the bread in plastic wrap or aluminum foil. For short-term storage, leave it at room temperature for up to three days. If you want to keep it for longer, consider placing it in an airtight container. This will help maintain its moisture and prevent it from becoming stale.
Can I freeze garlic herb braided bread?
Definitely! Freezing is a fantastic option if you want to savor the taste of your garlic herb braided bread later. To do this, wait until the bread has completely cooled. Then, wrap it tightly in plastic wrap and place it in a freezer-safe bag. It can last for up to 3 months in the freezer. When you’re ready to enjoy it, just let it thaw at room temperature or reheat in the oven for that fresh-out-of-the-oven experience.
For even more tips on storing bread, check out this helpful article from King Arthur Baking that goes into more detail about best practices.
If you have any more questions or need additional tips for your baking adventures, feel free to ask! Happy baking!
Conclusion on Garlic Herb Braided Bread
Making garlic herb braided bread is not just about baking; it’s about creating a delightful experience that fills your home with inviting aromas. This bread is a crowd-pleaser, whether served warm with butter or as a side to your favorite dishes.
Why You’ll Love It
- Flavorful Twist: Infused with herbs and a hint of garlic, each bite is packed with flavor.
- Versatile Recipe: Perfect for a casual dinner or a festive gathering; it’s truly a showstopper.
- Great for Leftovers: Use it for sandwiches or as a tasty snack the next day!
For more tips and variations, check out resources like The Kitchn and Serious Eats. Enjoy your baking journey, and don’t forget to share your creations with friends—it’s bound to bring smiles at any table!
PrintGarlic Herb Braided Bread: The Best Recipe for Home Bakers

A deliciously crafted garlic herb braided bread recipe, perfect for home bakers looking to impress.
- Prep Time: 10 minutes
- Cook Time: 30 minutes
- Total Time: 1 hour 40 minutes
- Yield: 1 loaf
- Category: Bread
- Method: Baking
- Cuisine: American
- Diet: Vegetarian
Ingredients
- 2 cups all-purpose flour
- 1 tablespoon instant yeast
- 1 teaspoon salt
- 1 tablespoon sugar
- 1 tablespoon olive oil
- 1 cup warm water
- 3 cloves garlic, minced
- 2 tablespoons fresh herbs (such as rosemary and thyme)
Instructions
- In a large mixing bowl, combine flour, yeast, salt, and sugar.
- Add olive oil and warm water; mix until a dough forms.
- Knead the dough for about 10 minutes until smooth.
- Place in a greased bowl, cover, and let rise for 1 hour.
- Punch down the dough and incorporate minced garlic and herbs.
- Divide dough into three equal sections and braid them together.
- Let the braided loaf rise for another 30 minutes.
- Bake at 375°F (190°C) for about 25-30 minutes or until golden brown.
Notes
- For extra flavor, brush the braid with melted butter before baking.
- You can add cheese into the braid for a cheesy version.
Nutrition
- Serving Size: 1 slice
- Calories: 150
- Sugar: 1g
- Sodium: 200mg
- Fat: 5g
- Saturated Fat: 1g
- Unsaturated Fat: 3g
- Trans Fat: 0g
- Carbohydrates: 24g
- Fiber: 1g
- Protein: 4g
- Cholesterol: 0mg


")