

Introduction to Easy Turtle Bars
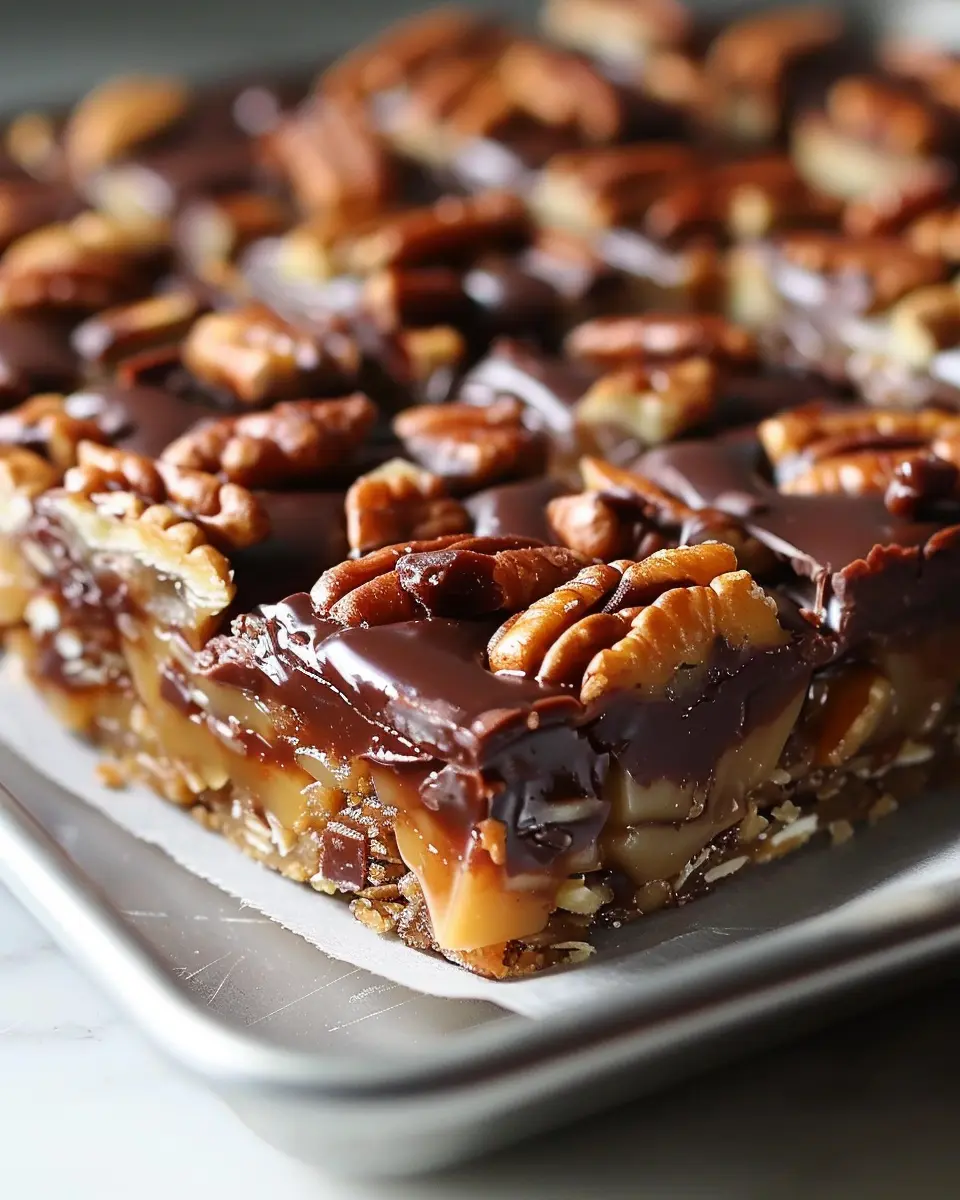
If you’re a young professional navigating the delightful chaos of work, social life, and everything in between, you’re likely on the lookout for quick and satisfying treats to enjoy either solo or with friends. This is where easy turtle bars come in—your new favorite dessert that seamlessly combines indulgence with simplicity.
Why Easy Turtle Bars are the Ultimate Dessert for Young Professionals
Imagine this: You’ve just wrapped up a long day at work. Instead of heading out for overpriced desserts or spending hours in the kitchen, you can whip up a batch of easy turtle bars in no time. These delectable treats are rich, gooey, and oh-so-chocolaty, layered with irresistible caramel and nuts—perfect for satisfying your sweet tooth without adding stress to your day.
Convenience Meets Flavor
One of the best things about these bars is their straightforward recipe. With just a handful of ingredients, you can create a stunning dessert that will impress your friends at your next gathering. Plus, they allow you to dabble in some light baking without requiring extensive culinary skills. If you’ve ever felt intimidated by complicated recipes, this is your golden ticket!
Great for Any Occasion
Whether you’re prepping for game night, a casual get-together, or just craving something sweet, easy turtle bars are versatile enough to cater to all. You can customize your ingredients too—feel free to swap out nuts or choose a different type of chocolate based on your mood and pantry stock. Websites like AllRecipes or Food Network offer great variations to inspire you.
A Sweet Solution for Busy Lives
Across the United States, dessert consumption is on the rise. According to a report by Technomic, 77% of consumers indulge in dessert once a week. That’s why having a go-to recipe can be a lifesaver in your busy schedule. So why not treat yourself? With a total of ten minutes for prep and just twenty to bake, you can dive into the world of easy turtle bars with minimal effort.
With these delightful bars, you’ll find that life becomes a little sweeter—so roll up your sleeves and get ready to enjoy!
Ingredients for Easy Turtle Bars
Creating easy turtle bars at home is a delightful venture, perfect for satisfying your sweet tooth or impressing friends at gatherings. Let’s dive into what you’ll need!
Key Ingredients for the Crust
To form a delicious base, gather these essentials:
- Graham Cracker Crumbs: About 1 ½ cups will give that classic sweet crunch.
- Butter: Melted, around ½ cup, will help bind the crumbs together.
- Granulated Sugar: A couple of tablespoons will enhance the flavor.
This combination creates a solid foundation for your bars, offering the ideal balance of sweetness and texture.
Necessary Ingredients for the Caramel Pecan Layer
This layer is where the magic happens! You will need:
- Caramel Sauce: Either homemade or store-bought, about 1 cup to ensure a gooey richness.
- Chopped Pecans: About 1 cup, a nutty addition that pairs beautifully with caramel.
These ingredients not only add flavor but also bring that signature turtle vibe to your dessert.
Essential Ingredients for the Chocolate Topping
To finish off your easy turtle bars, don’t forget the luscious chocolate topping:
- Chocolate Chips: Semi-sweet or milk chocolate works flexibly, about 1 cup.
- Vegetable Oil: A teaspoon to help the chocolate melt evenly and pour smoothly.
This chocolate layer adds a decadent touch that ties all the flavors together beautifully!
With these ingredients on hand, you’re well on your way to creating your own batch of mouthwatering turtle bars that will leave everyone wanting more! Why not check out this guide on caramel for some extra tips? Happy baking!
Preparing Easy Turtle Bars
Making easy turtle bars is a delightful way to indulge your sweet tooth while sharing a bit of happiness with friends and family. The combination of gooey caramel, crunchy nuts, and smooth chocolate makes these bars irresistible. Let’s dive into the steps to whip up this delicious treat!
Prepping Your Equipment and Pan
Before you get your hands sticky with caramel, it’s essential to have your kitchen equipment ready. Gather these items:
- A 9×13-inch baking pan
- Parchment paper or non-stick spray
- Mixing bowls
- An electric mixer (optional, but helpful)
- A saucepan for the caramel
- A spatula for spreading and mixing
Line your baking pan with parchment paper, leaving a bit overhanging on the edges. This little trick will make it easier to lift the bars out later, simplifying clean-up. If you don’t have parchment, a generous coating of non-stick spray will do just fine.
Crafting the Perfect Crust
The foundation of your easy turtle bars is a crumbly, buttery crust. Here’s a simple recipe to create a mouthwatering base:
- Ingredients:
- 1 cup unsalted butter, softened
- 2 cups all-purpose flour
- 1 cup brown sugar
- 1 cup chopped pecans or walnuts
- 1/2 teaspoon salt
- Instructions:
- In a mixing bowl, cream together the softened butter and brown sugar until it’s light and fluffy.
- Gradually add in the flour and salt, mixing just until combined. Fold in the chopped nuts.
- Spread the batter evenly in your prepared pan. Don’t stress if it doesn’t cover perfectly; the crust will bake up beautifully.
Creating the Delectable Caramel Layer
The caramel layer of your easy turtle bars is the star of the show. Here’s how to achieve that perfect sweetness:
- Ingredients:
- 1 cup granulated sugar
- 6 tablespoons unsalted butter
- 1/2 cup heavy cream
- 1 cup additional chopped pecans
- Instructions:
- In a medium saucepan over medium heat, combine the sugar and butter. Stir the mixture as it melts, allowing it to come to a gentle boil.
- Gradually pour in the heavy cream, and keep stirring until it thickens into a creamy sauce, which usually takes 5-10 minutes. Remove it from the heat and let it cool slightly before pouring over your crust.
Assembling the Layers
Now that you have your crust and caramel ready, it’s time to assemble your masterpiece:
- Pour the warm caramel layer over the baked crust, spreading it evenly to cover every last bit.
- Sprinkle the additional chopped pecans over the top. This not only adds texture but also gives a lovely nutty flavor to your easy turtle bars.
Let the assembled layers cool in the fridge for about 30 minutes. This will help everything set nicely.
Adding the Chocolate Topping
The last touch to make these dessert bars truly decadent is the chocolate topping:
- Ingredients:
- 1 cup semi-sweet chocolate chips
- 2 tablespoons coconut oil or vegetable oil
- Instructions:
- Melt the chocolate chips and coconut oil together in a microwave-safe bowl. Heat in 30-second intervals, stirring in between until smooth.
- Drizzle or spread the melted chocolate over the cooled caramel layer. Ensure it’s evenly coated for that glorious finish.
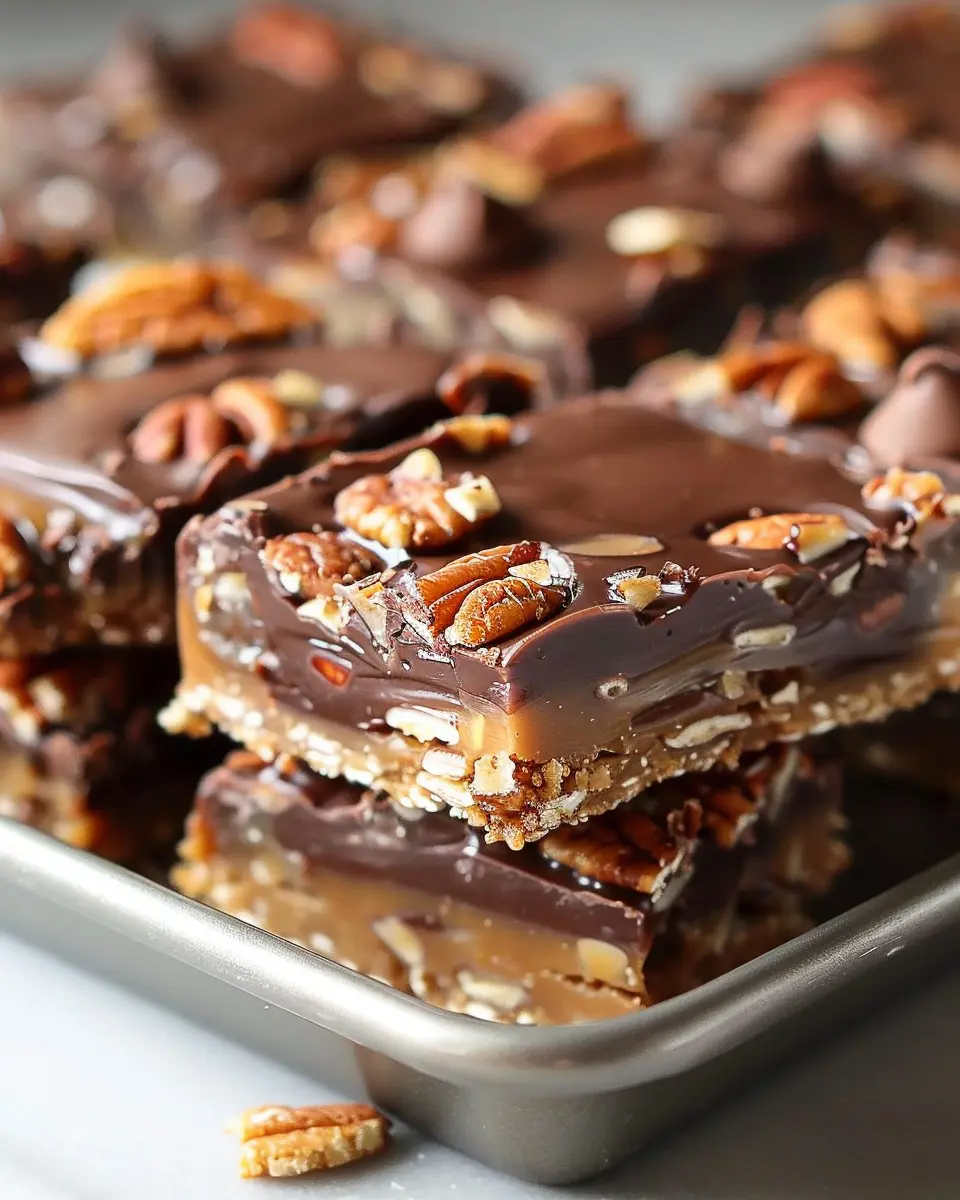
Once the chocolate layer has set, your easy turtle bars are ready to serve. Lift them from the pan using the parchment paper, slice into squares, and enjoy the delightful combination of flavors.
For more delicious dessert recipes, check out sites like Bon Appétit or Epicurious. Happy baking!

Variations on Easy Turtle Bars
When it comes to easy turtle bars, versatility is key. Whether you’re accommodating dietary restrictions or just want to switch things up, there’s a variation for everyone!
Gluten-Free Turtle Bars
If you’re looking for a gluten-free option, simply swap out regular flour for a gluten-free blend. Many brands offer fantastic alternatives that won’t compromise the delicious taste of your easy turtle bars. For an extra kick, consider almond flour for added nuttiness. Remember to double-check labels on all your ingredients to ensure they’re certified gluten-free!
Nut-Free Version of Turtle Bars
For those with nut allergies, making easy turtle bars nut-free doesn’t mean sacrificing flavor. Replace nuts with crispy rice cereal or seeds—such as pumpkin or sunflower seeds—for that desired crunch. These substitutes maintain the bar’s delightful texture while keeping it safe for everyone. Plus, they add a level of yumminess that your guests will love!
Adding a Twist: Seasonal Flavors
Why not get creative with seasonal flavors? Try incorporating pumpkin spice in the fall or add crushed peppermint candies during the winter holidays. These delightful touches will elevate your easy turtle bars and make them even more memorable. Fresh fruit toppings, like strawberries or blueberries, can add a touch of brightness in the summer.
Don’t forget, if you want to dive deeper into variations and creative recipes, check out sources like The Kitchn or Serious Eats for exciting ideas. Each adjustment allows you to make these bars uniquely yours while still being simple and delicious!
Cooking Tips and Notes for Easy Turtle Bars
Tips for Making the Perfect Crust
To create the ideal crust for your easy turtle bars, start with quality ingredients. Opt for unsalted butter for better control over the salt level, and always use room temperature butter for easier mixing. When blending, make sure to avoid overworking the dough; a flaky crust is all about finding that perfect balance.
- Consider using a food processor for even mixing.
- Press the dough firmly into the pan to avoid a crumbly texture.
Ensuring Caramel Consistency
Achieving the right caramel consistency is essential in your easy turtle bars. Use a candy thermometer to ensure accuracy—aim for 240°F for a soft-ball stage. If you don’t have a thermometer, try the cold water test: drop a bit of caramel into cold water, and if it forms a soft ball, you’re good to go!
- Stir continuously to prevent burning, especially toward the end of cooking.
- For a richer flavor, add a pinch of sea salt to your caramel.
Ideal Storage Solutions for Freshness
To keep your easy turtle bars fresh, store them in an airtight container. Layer parchment paper between bars to prevent sticking. For longer freshness, refrigerate them for up to a week, or freeze for up to three months—just remember to wrap them securely in plastic wrap.
Planning to share your treats? For more tips on storing baked goods, check out resources like The Kitchn. Happy baking!
Serving Suggestions for Easy Turtle Bars
Pairing with Ice Cream and Whipped Cream
Imagine biting into a decadent easy turtle bar, only to discover the delightful contrast of a cold scoop of vanilla ice cream melting into the warm, gooey layers. Pairing your turtle bars with ice cream elevates the dessert experience to another level. Opt for classic flavors like vanilla or the more adventurous salted caramel to complement the rich chocolate and caramel goodness of the bars. A dollop of fresh whipped cream on top adds a light touch that balances the desserts’ richness beautifully.
Creative Ways to Decorate Turtle Bars
Want to impress your friends at your next gathering? Decorate your easy turtle bars with flair! Drizzle extra melted chocolate or caramel sauce on top for an eye-catching finish. You can also sprinkle chopped pecans for a delightful crunch. Another fun idea is to add a touch of sea salt—it not only enhances flavor but also adds a gourmet appeal. Searching for inspiration? Check out Martha Stewart’s tips on dessert presentation.
Serving your easy turtle bars with these creative touches will surely make them a hit!
Time Breakdown for Easy Turtle Bars
When you’re ready to whip up some easy turtle bars, knowing how long each step takes can make the baking process smoother. Here’s a quick breakdown to help you plan your kitchen time effectively!
Preparation Time
Getting everything ready for your easy turtle bars won’t take long—about 15 minutes should do the trick. This includes mixing the ingredients and preparing your baking dish. Make sure to have everything measured and chopped for a seamless experience!
Baking Time
Once your mixture is ready, pop it in the oven. The baking time is approximately 25-30 minutes. You’ll know they’re done when the edges are golden brown. It provides just the right texture for that sweet and nutty turtle goodness.
Total Time
Adding it all up, you’ll spend around 40-45 minutes from start to finish. In no time, you’ll have decadent treats that are sure to impress your friends and family. Planning a get-together? These bars are perfect for sharing!
For more baking tips, check out resources from King Arthur Baking or America’s Test Kitchen.
Now, roll up those sleeves and get ready to enjoy your easy turtle bars!
Nutritional Facts for Easy Turtle Bars
When whipping up a batch of easy turtle bars, it’s just as important to enjoy their deliciousness as it is to know what you’re indulging in. Here’s a quick look at the nutritional facts so you can feel good about treating yourself.
Calories
Each serving of easy turtle bars generally comes in around 200 calories. This makes them a decadent yet manageable dessert option when you want to satisfy your sweet tooth without going overboard.
Sugar Content
While they taste rich and indulgent, these bars contain approximately 15 grams of sugar per serving. It’s the perfect balance for those who love a sweet treat but still want to keep their sugar intake in check.
Protein
Believe it or not, these easy turtle bars pack in some protein as well, featuring around 3 grams per serving. This little boost can help you stay fuller for longer—just one of the reasons why they make for a delightful snack.
By being aware of these nutritional facts, you can savor every bite of your easy turtle bars guilt-free. Interested in learning more about the ingredients? Check out resources from the USDA Nutrient Database for a deeper dive into food nutrition.
FAQs about Easy Turtle Bars
When it comes to easy turtle bars, you might have a few questions. Don’t worry—I’ve got you covered with answers that will help you enjoy this delightful treat even more!
Can I make these bars ahead of time?
Absolutely! One of the best things about easy turtle bars is that they can be made a day or two in advance. Simply prepare the bars, let them cool completely, and then cut them into squares. Store them in an airtight container at room temperature or in the refrigerator to keep them fresh. This makes them perfect for sharing at gatherings or simply having on hand for a sweet treat throughout the week!
How can I customize the toppings?
The versatility of easy turtle bars is one of their charms! While traditional toppings include chocolate and caramel, feel free to get creative. You can add:
- Chopped nuts: Pecans or walnuts are excellent choices.
- Different chocolates: White chocolate or dark chocolate can give unique flavors.
- Fruits: Sliced bananas or strawberries can add a fresh twist.
- Spices: A sprinkle of cinnamon or a dash of sea salt can enhance the flavor.
Customization means you can make these bars your own, fitting any taste preference you or your guests might have.
What’s the best way to store leftover bars?
Keeping your easy turtle bars fresh is key to enjoying them longer. If you have leftovers (which is rare!), store them in an airtight container. You can keep them at room temperature for up to four days or in the fridge for a week. If you want to save them for later, consider freezing them: wrap each square in plastic wrap and then place them in a freezer-safe bag. They can last up to three months in the freezer!
For more baking tips, check out resources from the American Baking Guild. Enjoy your easy turtle bars!
Conclusion on Easy Turtle Bars
The Perfect Treat for Cooking Enthusiasts in a Hurry
If you’re searching for a delectable dessert that doesn’t require extensive culinary skills, easy turtle bars are your answer. With a few simple ingredients and minimal prep time, you can whip up a batch that impresses friends and family alike. These layers of rich chocolate, chewy caramel, and crunchy pecans create a flavor profile that’s hard to resist.
Perfect for a busy weeknight or a casual gathering, these bars also offer a fantastic opportunity to get creative. Try swapping in your favorite nuts or experimenting with drizzled chocolate for added flair. So why not give them a try? You might just discover your new favorite sweet treat! For more inspiration, visit Taste of Home or Food Network to explore variations and tips tailored for the kitchen novice.
PrintEasy Turtle Bars: Indulgent Treats You’ll Want to Bake Today

These Easy Turtle Bars are a delicious combination of chocolate, caramel, and pecans that are perfect for any occasion.
- Prep Time: 15 minutes
- Cook Time: 35 minutes
- Total Time: 50 minutes
- Yield: 12 servings
- Category: Dessert
- Method: Baking
- Cuisine: American
Ingredients
- 1 cup all-purpose flour
- 1 cup brown sugar
- 1/2 cup unsalted butter, softened
- 1 cup chocolate chips
- 1 cup caramel sauce
- 1/2 cup chopped pecans
Instructions
- Preheat the oven to 350°F (175°C) and grease a 9×13 inch baking pan.
- In a bowl, mix together flour, brown sugar, and butter until crumbly.
- Press the mixture into the bottom of the prepared pan.
- Bake for 15 minutes, then remove from the oven.
- Sprinkle chocolate chips over the crust.
- Drizzle caramel sauce on top, then sprinkle with pecans.
- Bake for an additional 20-25 minutes until bubbly.
- Allow to cool before cutting into bars.
Notes
- These bars can be stored in an airtight container for up to a week.
- Feel free to substitute walnuts for pecans.
Nutrition
- Serving Size: 1 bar
- Calories: 250
- Sugar: 20g
- Sodium: 150mg
- Fat: 12g
- Saturated Fat: 7g
- Unsaturated Fat: 3g
- Trans Fat: 0g
- Carbohydrates: 30g
- Fiber: 1g
- Protein: 3g
- Cholesterol: 30mg


")