
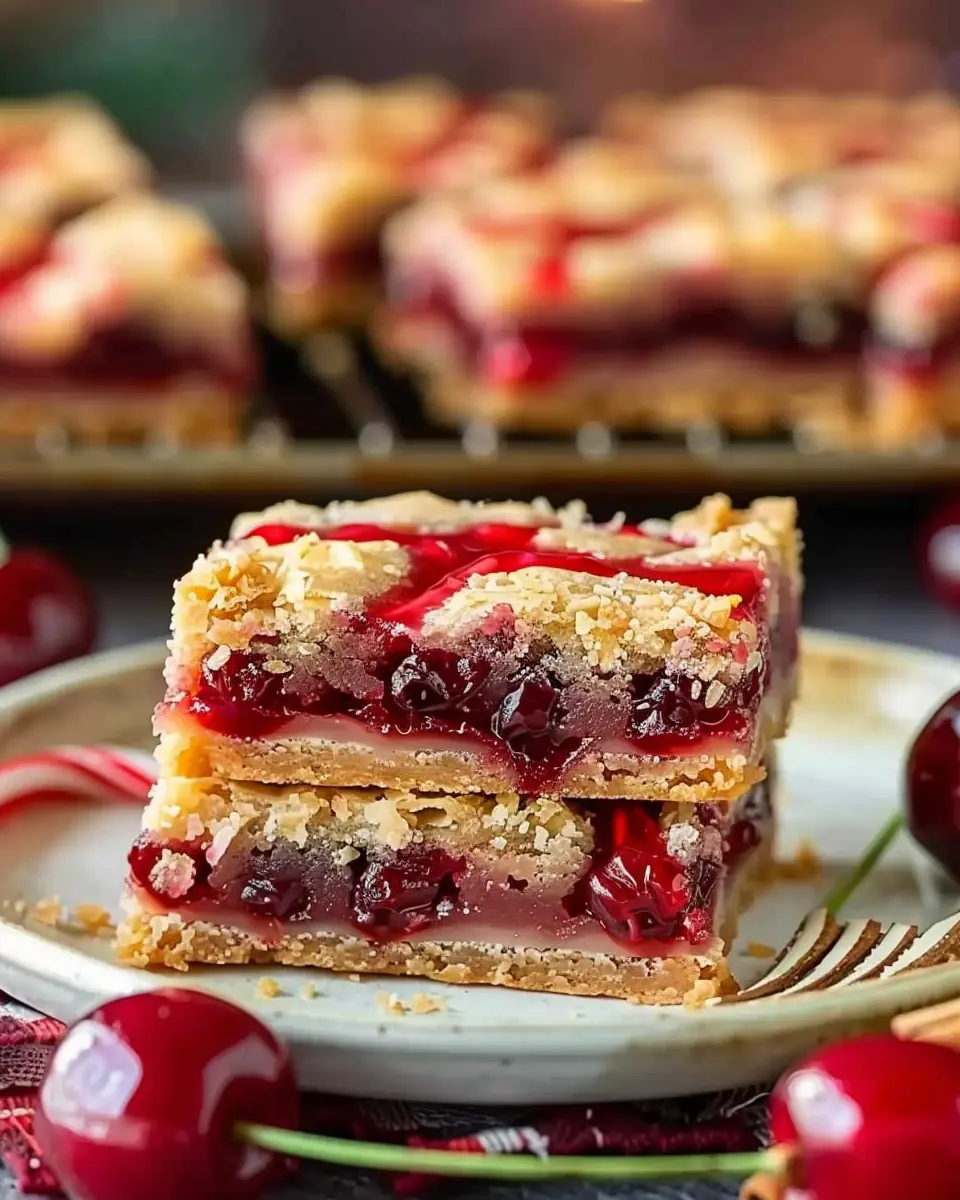
Introduction to Christmas Cherry Bars
The holiday season is a time for joy, togetherness, and, of course, delicious treats! Enter the Christmas Cherry Bars—a perfect fusion of festive flavors and convenient baking. These bars capture the essence of the season, combining the tartness of cherries with a buttery, crumbly crust that will have everyone reaching for seconds.
Why Christmas Cherry Bars are the Perfect Holiday Treat
When you think about holiday desserts, your mind might drift to traditional cakes and cookies. But have you ever considered how versatile Christmas Cherry Bars can be? They offer a unique twist that sets them apart from the usual fare. These bars are not only visually appealing—with their bright red cherry filling peeking out from a golden crust—but they also evoke that warm, fuzzy feeling we crave during the colder months.
-
Flavor Explosion: The sweet and sour cherry filling is a delightful surprise that’s both comforting and refreshing. Cherries are known for their high levels of antioxidants, making these bars a tastier alternative to typical sugary treats.
-
Easy to Make: Who wants to spend all day slaving away in the kitchen, especially during the hustle and bustle of the holidays? This recipe comes together quickly and requires minimal effort—perfect for busy young professionals looking to impress their friends and family without the stress.
-
Adaptable: You can easily modify the Christmas Cherry Bars to suit your dietary needs or preferences. Want a gluten-free version? Swap out the flour for almond or coconut flour. Have a cherry lover in the family? Add more cherries for a richer taste!
As you whip up a batch of these bars, consider how they will make an excellent addition to your holiday gatherings. You can serve them at parties, gift them to neighbors, or enjoy them while curled up on the couch watching your favorite holiday movie. Trust me, they will be a hit!
For more festive inspiration, check out this article on holiday baking tips to ensure your kitchen is winter-ready.
Embrace the holiday spirit with Christmas Cherry Bars—it’s a sweet journey you won’t want to miss!
Ingredients for Christmas Cherry Bars
When it comes to whipping up a delightful treat during the festive season, Christmas Cherry Bars are simply a must. Here’s what you’ll need to gather to create this delicious dessert that’s sure to impress your friends and family.
Essential Pantry Staples
- 1 cup of all-purpose flour: This is the base of your bars. Make sure it’s fresh for the best texture!
- 1/2 cup of granulated sugar: For that sweet holiday touch.
- 1/2 cup of softened butter: Adds richness, keeping your bars moist and delicious.
- 1 teaspoon of baking powder: This will help your bars rise perfectly.
Flavor Boosters
- 1 cup of cherry pie filling: The star ingredient! Bursting with flavor, this gives the bars their unique taste.
- 1/2 teaspoon of vanilla extract: To elevate those sweet notes.
- 1 large egg: Binds everything together.
These ingredients come together to create something truly festive. You’ll find more on Christmas Cherry Bars by checking out cooking blogs like AllRecipes or Food Network for inspiration! Whether you’re baking for a holiday gathering or just treating yourself, this recipe is a sweet way to celebrate the season.
Step-by-Step Preparation of Christmas Cherry Bars
Gather Your Ingredients
The joy of baking festive treats like Christmas Cherry Bars starts with gathering all the right ingredients. Here’s what you’ll need to whip up this delightful concoction:
- 2 cups all-purpose flour
- 1/2 cup powdered sugar
- 1 cup unsalted butter (softened)
- 1 jar (16 oz) cherry pie filling
- 1/2 cup semi-sweet chocolate chips
- 1 cup rolled oats
- 1/2 cup brown sugar
- 1/2 teaspoon cinnamon
- 1/2 cup chopped nuts (optional)
Make sure you have everything ready before you dive in. It’s like prepping for a big holiday meal; once you have your ingredients laid out, the process becomes a breeze. You’ll find more tips on prepping ingredients in this helpful cooking guide.
Create the Shortbread Base
Now, let’s kick off the fun by creating the base of your Christmas Cherry Bars. Start by preheating your oven to 350°F (175°C). While it’s heating, grab a mixing bowl and combine your softened butter and powdered sugar until it feels light and fluffy. This can take about 3–5 minutes using a hand mixer, but you can also go old-school and use a wooden spoon.
Next, slowly incorporate the flour into the mixture, blending until it forms a soft dough. Don’t be afraid to get in there and use your hands if needed; it’s the best way to ensure everything blends perfectly. Once your mixture is ready, press it evenly into the bottom of a greased 9×13 inch baking dish. This forms the delicious shortbread layer that will hold all the goodness of your Christmas cherry bars.
Incorporate the Cherry and Chocolate Layers
With the base done, it’s time to add the star of the show: the cherries! Spread the cherry pie filling evenly over the shortbread base, making sure to cover every inch. For that delightful touch, sprinkle semi-sweet chocolate chips over the cherries. The chocolate and cherry flavors combine beautifully, making each bite a little piece of heaven.
Wondering how to enhance the flavor profile even more? You might consider adding a splash of almond extract to the cherries for a nutty twist. Who knew Christmas Cherry Bars could get even better?
Prepare the Crumble Topping
Now, let’s go all-in on the crumble. In a separate mixing bowl, combine rolled oats, brown sugar, cinnamon, and a pinch of salt. Then, cut in cold butter until the mixture resembles coarse crumbs. If you’re feeling a little adventurous, you can add chopped nuts for extra crunch.
Take this crumble mixture and sprinkle it generously over your cherry and chocolate layers. The crumble adds that awesome texture contrast that makes each bite interesting. Plus, it’s so satisfying to see a beautiful layered bar taking shape!
Bake to Perfection
Finally, it’s baking time! Place your baking dish in the preheated oven and bake for about 30-35 minutes, or until the crumble is golden brown. The kitchen will start smelling incredible, and you’ll likely feel the holiday spirit kicking in. For best results, let your Christmas Cherry Bars cool in the pan before cutting them into squares. This helps everything set and makes for cleaner cuts.
Before you serve, consider dusting the tops with powdered sugar for that festive touch! There you have it—the most delightful Christmas Cherry Bars are ready to impress your friends and family.
For more holiday treats, check out these enchanting dessert recipes here.
Enjoy your baking, and may your holidays be filled with joy and merriment!
Variations on Christmas Cherry Bars
Christmas Cherry Bars are a fantastic treat to bring to holiday gatherings, but there’s so much more you can do with this delightful dessert! Let’s explore some fun variations that will make your bars stand out during the festive season.
Alternatives to Dried Cherries
While dried cherries add a special touch to your Christmas Cherry Bars, don’t hesitate to experiment with other dried fruits if you’re looking for something different. Consider using:
- Cranberries: These tart berries pair beautifully with sweet flavors, especially around the holidays.
- Apricots: Their natural sweetness can enhance the flavor profile and create a unique twist.
- Raisins: An easy substitute, raisins blend well with any chocolate combinations.
Try mixing different fruits for a colorful and flavorful medley, reminiscent of holiday festivities.
Different Chocolate Types to Use
The type of chocolate you choose can significantly influence the taste of your Christmas Cherry Bars. Here are some options to consider:
- Dark Chocolate: Rich and slightly bitter, it complements the sweetness of cherries beautifully. Looking for a higher cocoa content? Aim for 70% or more for an intense flavor experience.
- Milk Chocolate: If you prefer something sweeter, milk chocolate can provide that creamy texture and familiar taste we all love during the holidays.
- White Chocolate: For a twist on the traditional flavor profile, try white chocolate. It adds a creamy sweetness that can perfectly balance the tartness of your cherries.
Experimenting with chocolate types not only diversifies flavor but also elevates your Christmas Cherry Bars into artisanal treats that your friends and family will rave about! As you make these changes, don’t hesitate to share your creations on social media—it’s always thrilling to inspire others during the festive season!
For more creative ideas, check out sources like Bon Appétit and Food Network for additional inspiration as you craft your bars!
Tips and Notes for Christmas Cherry Bars
When making these delightful Christmas cherry bars, a few tips can ensure your creation dazzles at holiday gatherings.
-
Choose Quality Ingredients: Opt for fresh or high-quality jarred cherries. Fresh fruit gives a pop of flavor, while good-quality canned cherries save you time.
-
Keep It Cool: Allow your dough to chill before baking. This helps maintain its shape and creates a richer flavor. Just a quick 30-minute rest in the fridge does wonders!
-
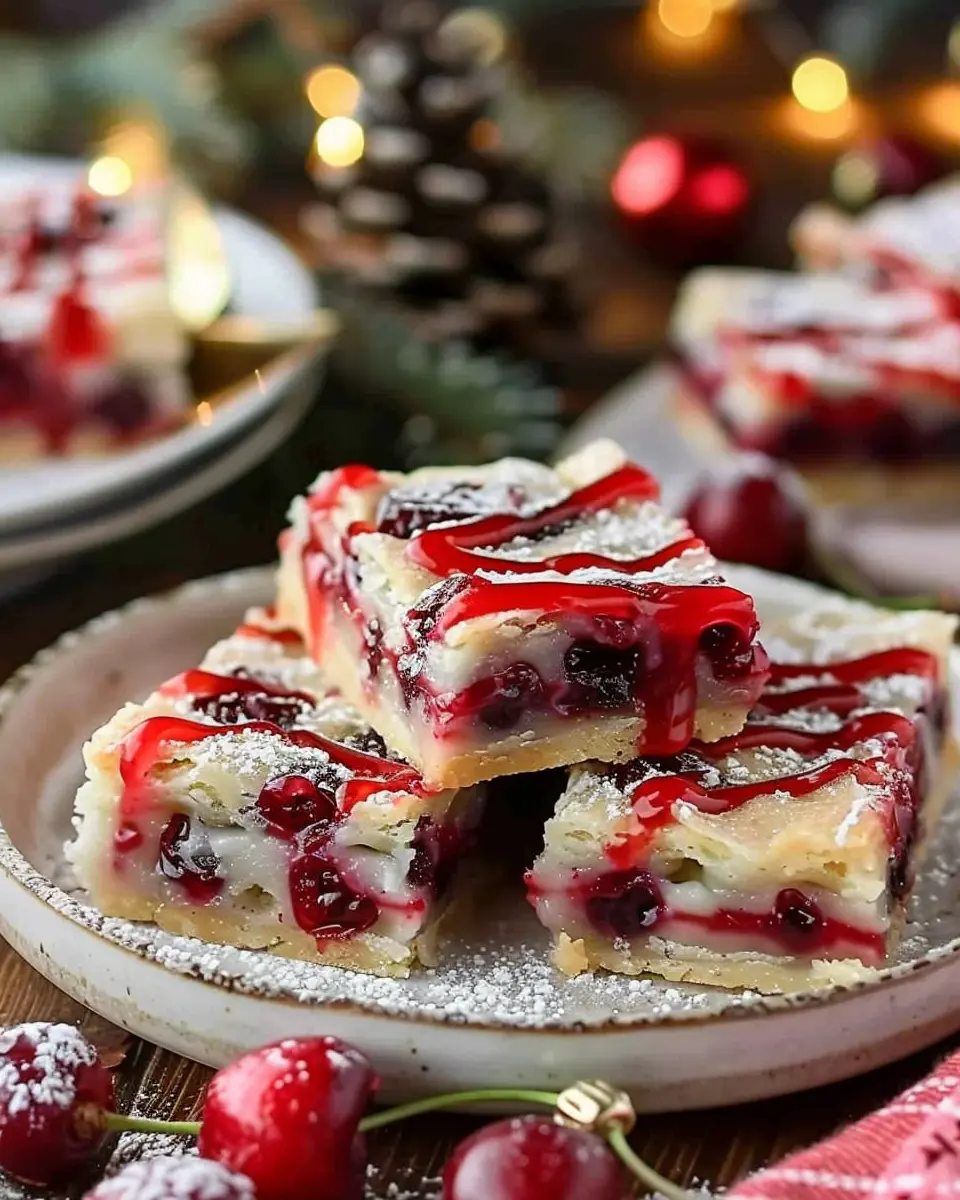
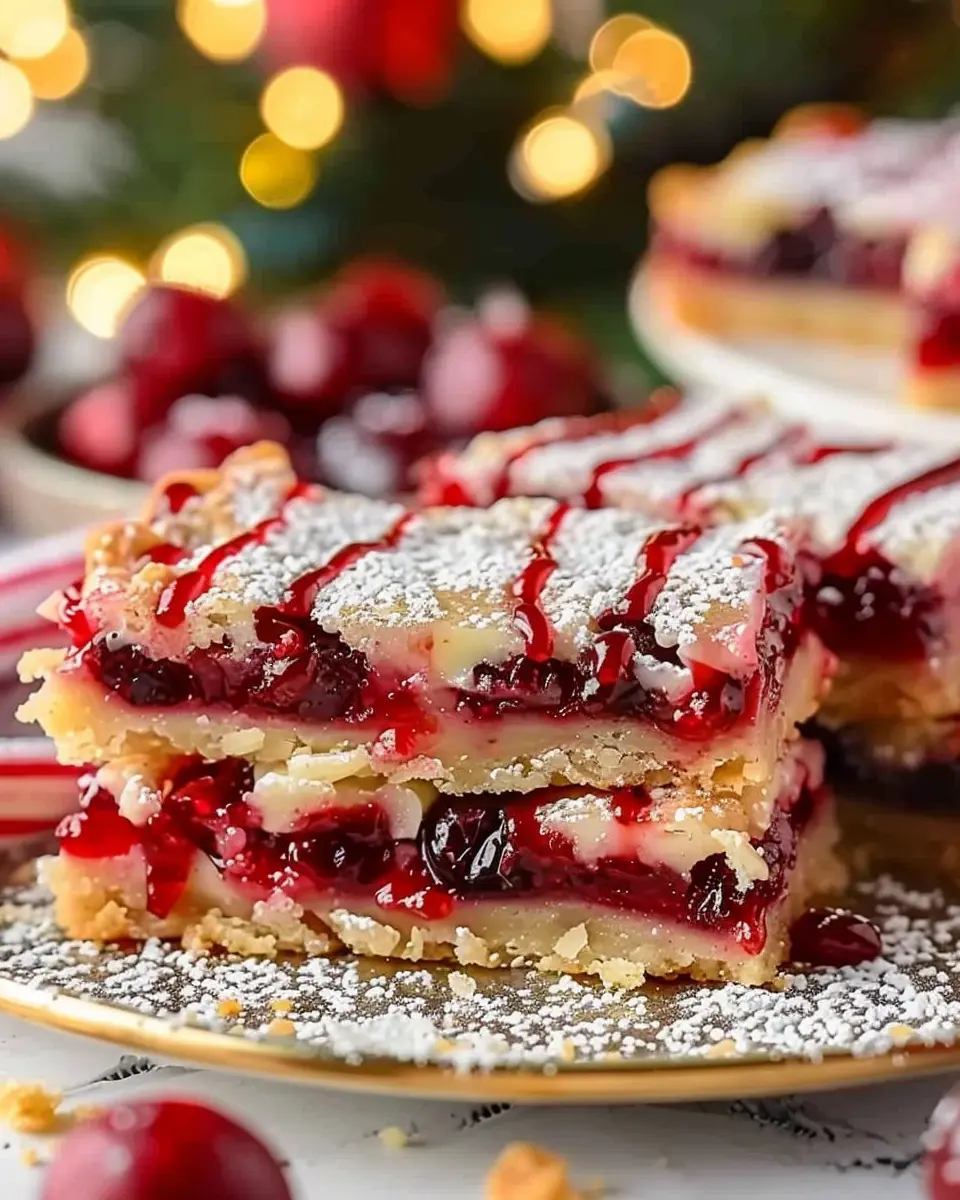
Don’t Skip the Topping: A sprinkle of powdered sugar or a drizzle of white chocolate can elevate your bars to another level. It’s a simple touch that looks festive and adds sweetness.
-
Storage Tips: These Christmas cherry bars can be stored in an airtight container for up to a week. If they last that long, that is! Wrap them well for potlucks or gift giving, and they will stay fresh.
Consider this recipe as your canvas—feel free to experiment with flavors by adding some almond extract or a hint of vanilla. Explore more baking tips from sources like the Food Network or BBC Good Food. Enjoy the baking!

Serving Suggestions for Christmas Cherry Bars
When it comes to serving your delightful Christmas Cherry Bars, presentation is key! Here are a few fun and festive ideas to elevate your dessert game:
Perfect Pair with Beverages
Consider pairing your bars with a delightful hot beverage. A rich cup of cocoa or a spiced apple cider can complement the sweet cherry notes beautifully. If you’re hosting a gathering, these beverages can create a cozy atmosphere.
Add a Touch of Whipped Cream
Top each slice of Christmas Cherry Bars with a dollop of freshly whipped cream or a scoop of vanilla ice cream. This adds a creamy texture that perfectly balances the tartness of the cherries. A sprinkle of cinnamon or nutmeg can add an extra holiday flair!
Serve on a Festive Platter
Presentation matters! Arrange your Christmas Cherry Bars on a vibrant holiday platter, surrounded by fresh mint leaves or sprigs of rosemary to add a splash of color. This simple trick can make your dessert the star of the table.
Share the Joy
Why not bring some cheer to your neighbors or coworkers? These bars make excellent gifts, especially when wrapped in festive cellophane and tied with a ribbon. Everyone will appreciate your thoughtfulness!
For more inspiration, check out this guide on entertaining during the holidays. It’s filled with tips to make your presentations pop!
Time Breakdown for Christmas Cherry Bars
When you’re preparing for the holiday season, knowing how much time to dedicate to baking can make all the difference. Here’s a quick breakdown for your delightful Christmas Cherry Bars:
Preparation Time
Getting started on your Christmas Cherry Bars doesn’t take long at all! You’ll need about 15-20 minutes to gather ingredients and mix them together. It’s a great time to enjoy some holiday music or even invite a friend to help out!
Baking Time
Once your mixture is ready, baking the bars will take approximately 25-30 minutes. Keep an eye on them as they oven-bake; the smell will be tempting!
Total Time
In total, you’re looking at around 45-50 minutes from start to finish. Perfect for a festive treat you can whip up in no time! For more holiday baking inspiration and tips, consider checking out resources like the American Baking Guild for expert advice. Whether for a gathering or a cozy night in, these Christmas Cherry Bars will surely impress!
Nutritional Facts for Christmas Cherry Bars
When indulging in Christmas Cherry Bars, it’s handy to know what you’re enjoying. Here’s a quick breakdown of the nutritional facts, offering a glimpse into the goodness packed within.
Calories
Each delightful serving of these Christmas Cherry Bars contains approximately 200 calories. This makes them a guilt-free treat amidst the holiday feasting while satisfying your sweet tooth.
Protein
These bars boast about 3 grams of protein per serving. Protein is essential, especially during the busy holiday season, contributing to muscle health and keeping your energy levels steady.
Sugar Content
With around 12 grams of sugar, the sweet flavor comes from a mix of natural cherry juices and sugar. While enjoying these bars, it’s good to keep your overall sugar intake in mind, especially with all the festive desserts around.
When enjoying Christmas Cherry Bars, remember balance! Pair them with a wholesome snack like Greek yogurt or nuts for a well-rounded treat. If you’re looking for more nutrition tips, check out sources like the American Heart Association.
FAQs about Christmas Cherry Bars
Can I use fresh cherries instead of dried?
Absolutely! While the classic version of Christmas Cherry Bars usually calls for dried cherries, using fresh ones can add a delightful twist. Just keep in mind that fresh cherries have higher moisture content, which could slightly alter the texture of your bars. If you go this route, be sure to chop them and consider reducing other liquids in your recipe to maintain the right balance. Fresh cherries can bring a vibrant burst of flavor and color to your bars!
How do I store leftover Christmas Cherry Bars?
To keep your Christmas Cherry Bars fresh and delicious, store them in an airtight container at room temperature for up to three days. If you have a larger batch or want to save some for later, you can refrigerate them for up to a week. Just make sure to separate layers with parchment paper to prevent sticking. For longer storage, consider freezing them! Wrap each bar tightly in plastic wrap and place them in an airtight freezer-safe bag. They can last for up to three months in the freezer—perfect for those unexpected cravings!
Can I make these bars gluten-free?
Definitely! Making Christmas Cherry Bars gluten-free is easy and just as tasty. You can simply substitute regular flour with a gluten-free all-purpose flour blend. Look for options that include xanthan gum for the best texture. Additionally, always ensure your baking powder is gluten-free, and check the labels on your dried cherries. Your guests will be none the wiser, enjoying every bite of your delicious holiday treat!
For more insights on festive baking, check out Sally’s Baking Addiction or King Arthur Baking for tips on flour substitutes and creative ideas!
Conclusion on Christmas Cherry Bars
As we wrap up this delightful journey into the world of Christmas cherry bars, it’s clear why these treats hold a special place in holiday traditions. They strike the perfect balance between sweet and tart, making them a crowd favorite at gatherings.
Whether you enjoy them as a festive dessert at family dinners or pack them up as gifts for friends, these bars are sure to bring joy. Plus, they’re easy to whip up, even for those new to baking.
Try out the recipe, and who knows? You might just create a new holiday favorite! For more delicious recipes, check out this baking guide.
PrintChristmas Cherry Bars: The Best Easy Dessert for Festive Joy
Delight in the festive spirit with these easy Christmas Cherry Bars, a perfect dessert for holiday gatherings.
- Prep Time: 15 minutes
- Cook Time: 35 minutes
- Total Time: 50 minutes
- Yield: 12 bars
- Category: Dessert
- Method: Baking
- Cuisine: American
Ingredients
- 1 cup all-purpose flour
- 1/2 cup unsalted butter, softened
- 1 cup sugar
- 2 large eggs
- 1 teaspoon vanilla extract
- 1 can (21 ounces) cherry pie filling
- 1/2 teaspoon almond extract
- 1/4 teaspoon salt
Instructions
- Preheat the oven to 350°F (175°C) and grease a 9×13-inch baking pan.
- In a bowl, cream together the butter and sugar until light and fluffy.
- Add eggs one at a time, mixing well after each addition. Then stir in the vanilla and almond extract.
- Gradually add the flour and salt, mixing until just combined.
- Spread half of the batter into the prepared baking pan.
- Pour the cherry pie filling over the batter, and then drop spoonfuls of remaining batter on top.
- Bake for 30-35 minutes, or until lightly golden and set.
- Allow to cool before slicing into bars.
Notes
- For a festive touch, sprinkle powdered sugar on top before serving.
Nutrition
- Serving Size: 1 bar
- Calories: 250
- Sugar: 20g
- Sodium: 150mg
- Fat: 10g
- Saturated Fat: 6g
- Unsaturated Fat: 3g
- Trans Fat: 0g
- Carbohydrates: 35g
- Fiber: 1g
- Protein: 2g
- Cholesterol: 60mg

")